Posted on

Experiments in Composition

Back in December I was not too far from my home town and I drove past another abandoned farmhouse that I knew I had to shoot as part of my on-going series on farmland and barns in Michigan.

An abandoned farm house with junk in front of it

One of my main goals with these photos was to challenge myself to think outside the box on my compositions. Many of my photos tend to follow very basic compositions like the Rule of Thirds and when viewed in succession, it can get obvious and boring to look at. On this outing, I wanted to experiment with more styles to see how they changed the story of the image.

Much of my inspiration came from Willem Verbeeck’s and Nick Carver’s YouTube channels. To be 100% honest, I don’t actually like a whole lot of their work. But, one thing I was able to take away from their work is their different approaches to composition. Verbeeck has this very odd way of framing photos that makes a lot of his work look like photos of nothing. But what’s really happening is the subjects of his photo aren’t as obvious as they first seem. You can see many examples of what I’m talking about in this video.

This photo was very much inspired by Verbeeck

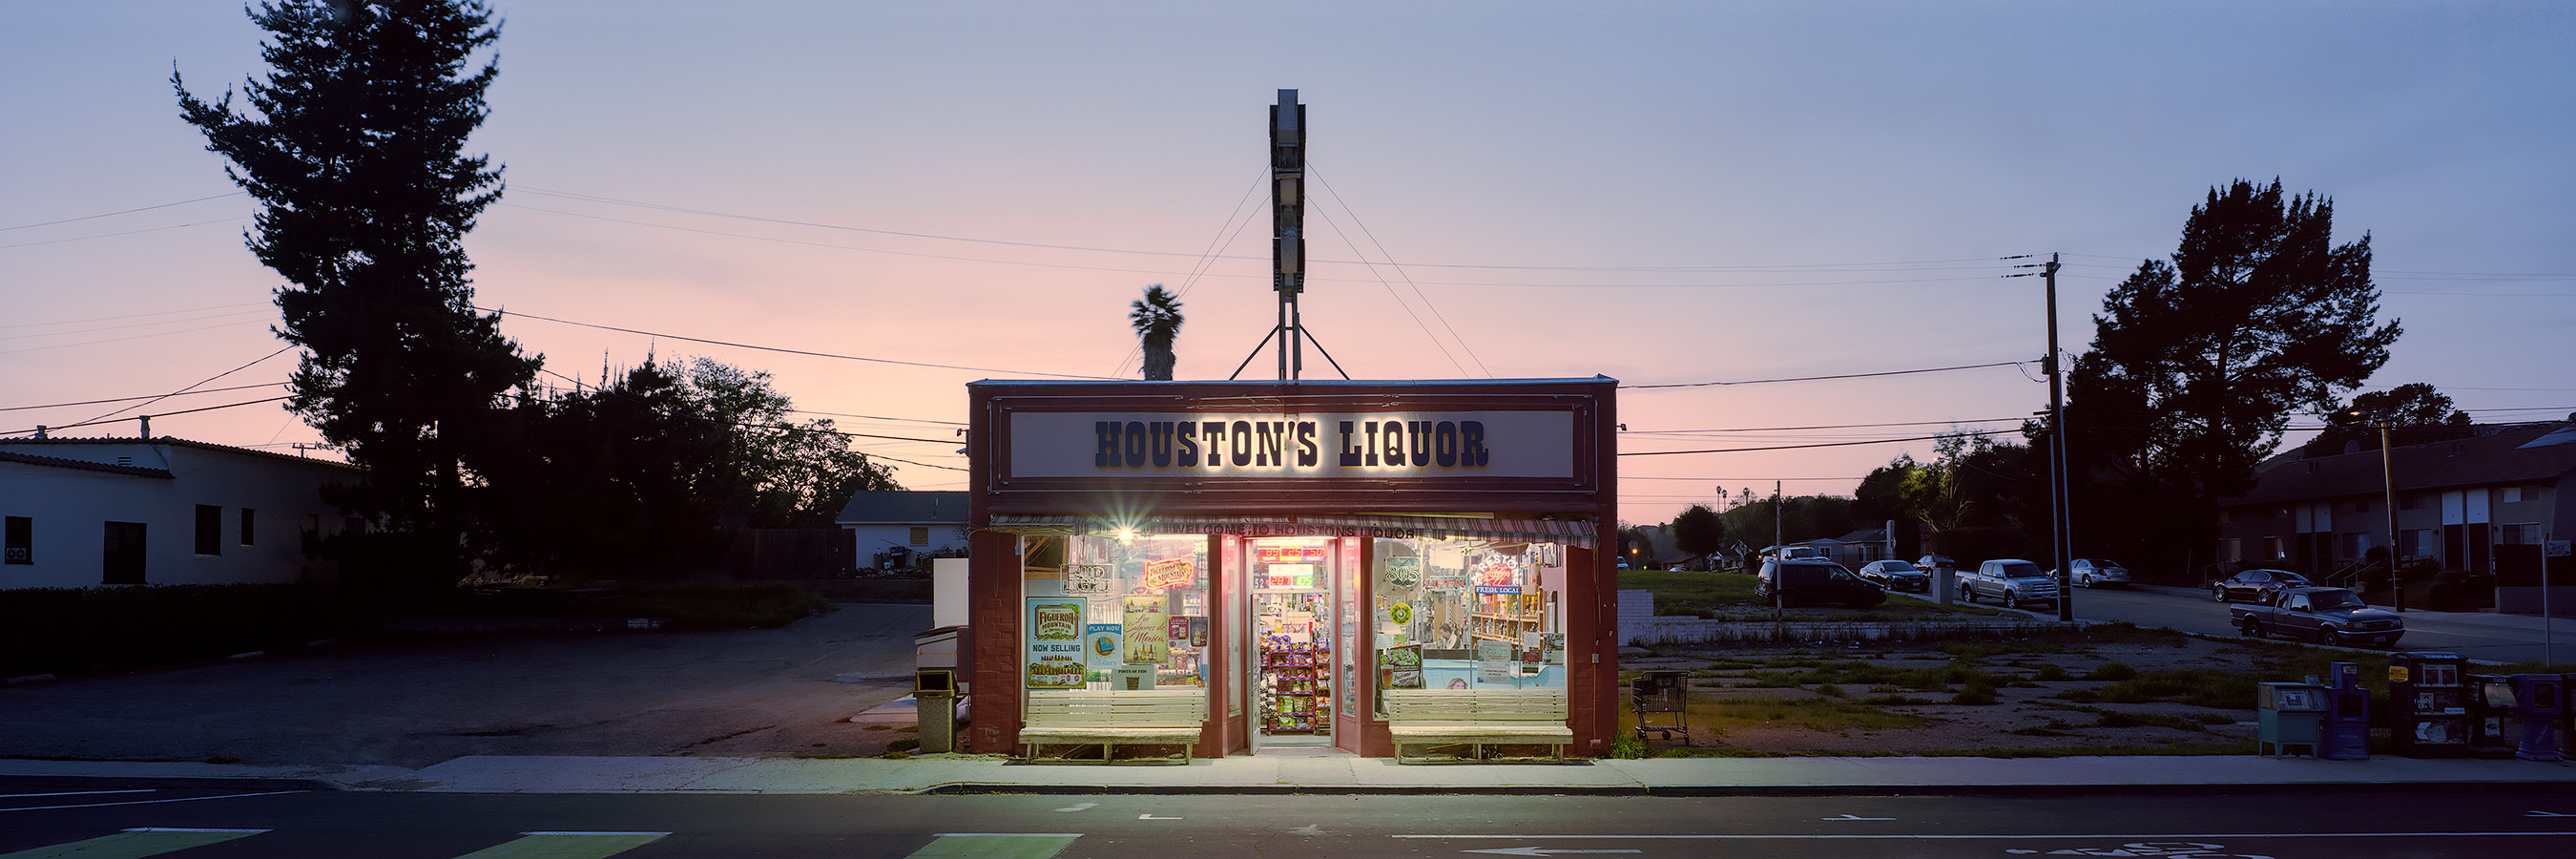
Where Verbeeck goes complex, Carver goes super simple. His more popular photos are all done on a panoramic medium format film camera with the subject of the image dead center in the frame. It’s an intriguing combination, as most panoramics are made with the intent of fitting in a very wide or tall subject into the entire frame without zooming out and potentially loosing the subject in the extra vertical space. Carver’s photos use the panoramic to instead draw their subject out of the frame even more by putting them in their empty context.

While not panoramic, the simple framing of the subject is inspired by Carver’s work. Although I wish I shot it with a shallower depth of field as the building in the background is distracting.

Like all of the images in this series, I used the Mamiya C330 medium format film camera with Ilford film. For being almost 50 years old, the Mamiya Sekor 80mm f/2.8 is astoundingly sharp when stopped down. Here’s a 1-to-1 crop on the upper-right on the tractor grill from the earlier image taken at f/11.

Click to see a full-size version

This is from a flatbed scan from a mid-level epson scanner and the film is still out-resolving the 45 mega pixel TIFF. This image has more detail in it than anything I’ve shot with my A7ii. Crazy!

I think the experiment was a resounding success as I feel the images I took on this outing are some of the best I’ve ever made. It wasn’t until I scanned the tractor image that I was sold on the idea that this series could really become something more. Additionally, after taking and reviewing these photos I think I have a better understanding of Verbeeck’s work. Things appear cut off or the subject is unclear because he’s trying, whether consciously or unconsciously, to photograph a feeling or even just a color rather than a subject.

If you like these photos you can them and more over on the project page. If you like my photography, you can follow me on instagram for my up to date work.

Posted on

The Coffee Shop With The Sony 16-35 f/2.8 GM

Recently I had the pleasure of renting a Sony 16-35 f/2.8 GM lens for use on my Sony A7ii. At that I rented it, I was planning on shooting some indoor wedding photography where the wide angle and bright aperture would come in handy. With the current global “situation” (don’t want to use the word since it flags you in search), the event was limited to ten people and I could no longer attend.

Unperturbed, I knew I still had a $2,200 lens in my hands for a few days, so I made the most of it. My mom’s coffee shop (which is still taking orders by the way) recently renovated the entire interior and needed some shots to promote it on Facebook and to update the images on Google Maps. I decided to head over and see what kind of photos I could get. I’ve never used a lens wider than 28mm on a full-frame camera before, so I was absolutely blown away by the kind of images I was getting.

Interior of Battle Alley Coffee

Now I’ll be the first to admit my interior photography needs some work. The edges of the frame are crowded and there’s way too much going on in this photo. But, on the bright side, by intention was to portray the relaxing nature of the interior and I think that comes across.

Espresso machine making double shots
Close up of the espresso machine making two shots

While this isn’t a review of the lens, I was kind of surprised at the low corner sharpness at f/2.8 zoomed out to 16mm. But looking at sample images of the competition, this seems to be the norm. Limitations of the laws of physics I suppose.

After handling the lens for a few days, I’m now seriously considering buying the Samyang AF 18mm f/2.8 FE to add an extreme wide angle lens to my toolbox. It’s only $350 brand new, and there’s just no other way to capture the feeling and look that a 16-18mm wide angle lens gives you. Regular sized objects like the espresso machine can now fill the frame and grab your attention. Average sized interiors become cavernous. And usually plain exteriors become vast, wide-open landscapes you can fall into.

Train Tracks in Holly
You know I had to do the stereotypical train track shot

Posted on

5 Frames of Ilford FP4+

This article originally appeared on emulsive.com on April 17, 2020

I grew up in an area that used to be completely farm land about 100 years ago. Some of the smaller family owned farms are still in operation, but almost all of the original land owners decided a long time ago that the money from selling the land would be more than the money they’d be paid by continuing to sell crops. The original plots of land still have the original farm house and barn, both of which now look out of place on a much more modestly sized plot of land.

Fast forward 100 years and most of the owners these old buildings are poor and don’t have the money to keep up with repairs. The barns are in especially poor condition since they serve less practical value than the house. I wanted to capture these buildings before more of them fall over from age or are torn down from condemnation. There’s something about old barns that I can’t quite put my finger on that makes me love them. These giant yet practical buildings have withstood the test of time and were often put together by a single family or the community working together.

I had never shot black and white on medium format before, so I took my newly acquired Mamiya C330 Professional, the 80mm f/2.8 Mamiya Sekor and a 120 roll of Ilford FP4+ to start my project. The C330 is a twin lens reflex with a waist level viewfinder that’s notable for having an interchangeable lens system, unlike most other TLRs. Mamiya is generally known for well made medium format cameras with sharp glass, and the C330 appears to be no exception. It shoots 12 6×6 negatives on a roll, which was great for me, as I’ve never shot anything other than 2:3 pictures and it acted as a good creative limitation.

The smooth tones and fine grain were exactly what I was looking for when I choose FP4+, and I couldn’t be happier with how these images turned out. I developed these negatives in Rodinal with a 1:25 dilution for nine minutes and scanned them on an Espon v600.

If you like this content, be sure to subscribe with your favorite news reader to stay up to date and to follow me on Instagram for more photos.

Posted on

A Detroit Photowalk With JCH Streetpan 400

Recently, I went on a photowalk in downtown Detroit to try to finally get some good shots after my previous failures with black and white film. The forecast called for overcast skies, so I decided to grab JCH Streetpan 400, which I’ve been meaning to try for some time now. If there’s one thing I like in my black and white photos it’s deep, ink-like blacks and JCH Streetpan 400 has it in spades.

Man praying in Old St. Mary's Catholic Church on JCH Streetpan 400
Old St. Marys, Detroit

For this outing, I took my Canonet QL 17 GIII which is a great little Canon rangefinder with a fixed 40mm f/1.7 lens. I wanted to grab a camera that was simple and light since I was planning on walking a long distance.

Unfortunately, the skies were clear and blue like it was the middle of July rather than the middle of November in Michigan. 400 speed film is way to fast for the bright outdoors, especially when your camera of choice has a max shutter speed of 1/500th of a second. I had no choice to proceed since I only brought one roll of color (Portra 400) and one roll of black and white (Streetpan 400).

I have yet to buy the right replacement battery for the Canonet, so I was guessing the aperture and shutter speed with the sunny-16 rule. A lot of the outdoor shots ended up being over or under exposed. With the sun bearing down, f/16 at 1/500th of a second was still too much light.

Still, I was able to get some great shots and fix my mistakes in post.

Racing car graffiti in Detroit on JCH Streetpan 400
Is it still graffiti if it’s commissioned?
Horace E. Dodge Fountain on JCH Streetpan 400
This is supposedly a fountain, though I’ve never seen water coming out of it
Spirit of Detroit on JCH Streetpan 400

The above photo of the Spirit of Detroit has very little cropping, so you can see how small the grain is compared to the image size. I love the sharpness and grain size I get out of Streetpan. The grain is small enough to be ignored while large enough to add that je ne sais quoi to the photo.

Monument to Joe Louis on JCH Streetpan 400

Is It Worth It?

The biggest downside here is the cost. At the time of writing, JCH Streetpan is $11 for a 36 exposure roll vs $5.69 for a 36 exposure roll of Ilford HP5+.

For my money, JCH Streetpan is totally worth it and it’s my favorite 400 speed film so far. I love the contrast and the blacks I get straight out of the camera. To get the same look out of HP5+, I’d have to push it to 800 or 1600. Without a camera with a max shutter speed of at least 1/4000th of a second, that’s really not feasible.

If you like this content, be sure to subscribe with your favorite news reader to stay up to date and to follow me on Instagram for more photos almost every day.

Posted on

Throwback Thursday: Ludington Lighthouse

Ludington Lighthouse

I shot this photo of the Ludington lighthouse on October 21, 2017. I was in the area camping with my family and we took a trip to the beach with the dogs and walked across this really precarious walkway (that doubled as a protective wall for the docks) about a quarter mile out to this lighthouse.

Walkway to the Ludington lighthouse

These were taken with the iPhone SE by just holding down the shutter until the perfect wave came into frame. Thanks to Apple’s great machine learning I didn’t have to wade through too many photos to fine the right shot. Additionally, we just happened to get out there in the late afternoon so the lighting was perfect as well.

If you like this content, be sure to subscribe with your favorite news reader to stay up to date and to follow me on Instagram for more photos almost every day.

Posted on

My Top 4 Mistakes in Developing Black and White Film

Old St. Mary's Church in Detroit on Kodak T Max 100

In my journey to make film a core part of my photography, I’ve made my fair share of mistakes. I managed to mess up and lose 3 1/2 of the first four rolls of film I tried to shoot. I decided to stick it out and bought a roll of Kodak T Max 100 black and white film to do some architecture and street photography around Detroit. Taking my Canon AE-1 Program and two lenses I walked down Gratiot Avenue to the Renaissance Center and back up the water front.

The shoot went great, but as you may have gathered, I have a bad habit of learning only through trial and error. In this case the error meant trying to learn and mix the chemicals properly as the film was sitting in the tank developing.

The above shot of the inside of Old St. Marys is the only shot on the whole roll of 36 exposures that is presentable. All of the other photos look like this.

These photos are grainy, fuzzy, loaded with air bubbles, and covered in water streaks.

Here’s How to Avoid My Mistakes

One, buy three graduated cylinders to have your developer, stop bath and fixer mixed to the proper dilutions before you start developing. I bought three 1000ml cylinders on amazon, but you could probably get away with 600-700ml depending on the size of your tank.

Two, give the tank a couple of taps on a hard surface to dislodge the air bubbles on the film per agitation cycle. Those circular white spots are caused by trapped air keeping any developer from touching that part of the film. Angular or more square white spots on the film are actually chemical deposits from using hard water. Which leads me to …

Three, use distilled/demineralized water for your chemical mixes and final rinse. This is more of a timesaver than anything, since any decently filtered water (even from a well) won’t be hard enough to cause permeant defects. However, when the non-distilled water dries it will probably leave water spots over the non-emulsion side (the glossy side) of the film. These spots then need to be manually cleaned with a microfiber cloth which can waste another 15 minutes.

Four, use ONE DROP of wetting agent (Kodak Photo-Flo, Ilford Wetting Agent) per 600ml of water in the final rinse. Not using the wetting agent can lead to water spots or streaks. Using too much, like I did, also leads to soap streaks as you have essentially dunked your film into bunch of dish washer detergent. One drop is really all you need; give the film a couple of dunks and spins on the reel while in the wetting agent and you should be golden.

Correcting these mistakes, I’ve since made many successful black and white developments using Rodinal. Here’s a frame of Ilford Pan F+ I took over the weekend.

Bridge Across a Dam

If you like this content, be sure to subscribe with your favorite news reader to stay up to date and to follow me on Instagram for more photos almost every day.

Posted on

The Auction House: Where Your Stuff Goes When You Die

Nelis Disco Auction House in Holly, MI on Fuji Superia

In Holly, Neil’s Disco is an auction house located inside of an old warehouse. In a previous life it was probably a factory, but now it’s full of thousands of different lots which are stacked to the celling in many places. Stuff like this usually comes from estate sales or people desperate for cash and willing to sell everything they own. There’s nothing wrong with most of this stuff, and it goes for super cheap. I got a couch, a TV stand, and an exercise bike for $250 (the bike alone costs $1,000 new). And yet, most people will always buy these items new, and then they’ll end up here or in a landfill.

This photo was taken on my very first roll of film. I used my FED 4 Russian rangefinder with the cult classic 50mm f/2 Industar 61 lens and Fuji Superia 400 color negative film (because that’s all they had at my local camera shop). I would rate Superia as “just ok”, which isn’t surprising since it’s a lower cost option.

Nelis Disco Auction House in Holly, MI on Fuji Superia

If you like this content, be sure to subscribe with your favorite news reader to stay up to date and to follow me on Instagram for more photos almost every day.

Posted on

My First Roll of 120 Film

A train in front of the Holly water tower on Fuji Pro 400H 120 film

On October 26th, I purchased the the Mamiya C330 which is my first working 120 format medium format camera. In anticipation of buying it I had already purchased some Fuji Pro 400H color film so I could use the camera as soon as I bought it. Well it turns out that worked in my favor since there was a trick-or-treat event in downtown Holly that I didn’t know about and I got a chance to take this picture of this antique train with the iconic water tower in the background.

Once I finally got the 120 film holder for my Epson v600 in the mail, I was ready to scan the negatives sitting lonely in my folder.

As with most of my first times trying new things with film, I made a lot of mistakes which I will hopefully learn from and fix going forward. Working without a prism is quite a challenge when trying to do handheld shooting so most of the photos on the roll aren’t really usable. Also, the main mistake I made is visible in the sky of the photo: the white splotches. I’m told this is caused by either air bubbles forming on the film during development due to lack of proper agitation, or using hard water. Either way, in the future I’m going to give a hard tap the side of the development tank after every agitation cycle to free those air bubbles. Plus, I’m going to be using distilled water to mix my chemicals and in my final wash with Photo-flo.

Posted on

Scrapped Car

Click for a larger version

Recently, I’ve started a new personal project in to get more hands on experience with black and white film photography. The area where I grew up used to be completely farm land about 100 years ago. Some farms are still in operation, but almost all of the families decided that the money from selling the land is more than the money they’d get selling crops.

However, quite often the original plots of land still have the barn and house that ran the old farm. These buildings wont be here for much longer; the barns especially have fallen into complete disrepair. I wanted to capture these rustic buildings with black and white film to show them in a new light. Hopefully if I can get enough interesting photos from this, I can turn it into a zine or even a book.

When I got to the property where I shot this photo, I was just planning on photographing this old tobacco ad painted on the side of this barn when I found this old car sitting behind it and I knew it would be the perfect subject for the FP4+ I was shooting. This was shot handheld with the Mamiya C330 Professional and the 80mm f2.8. It was developed in Rodinal at 1:25 dilution for nine minutes.

Despite being scanned on a flat bead scanner, I’m pretty happy with the resolution I was able to pull out of this (after tons of sharpening in Lightroom). This 6×6 negative was scanned at 3,600 dpi which created a 150 mb TIFF file.

Posted on

Detroit Railroad Club Open House

A miniature train station at the Holly Railroad Club

Twice a year, the Detroit Model Railroad Club in Holly opens its doors to the public to help raise money and show off their artistic skills in miniature form. I took my Sony A7ii and the 50mm f/1.8 to get some classic miniature shots.

A preist in a graveyard at the Holly Railroad Club
Two children gleefully look at trains at the Holly Railroad Club
A model train at the Holly Railroad Club
A miniature street at the Holly Railroad Club

Despite being over 30 miles away from Detroit, that’s where this club got its start and moved up north casing cheaper rent. Eventually they bought their current building and will stay there for the foreseeable future. I think these shots will make a great addition to my long term project of documenting my hometown, so stay tuned for a zine or book resulting from that work.